 |
Nightmare Creatures
Level 1: Find The Workshop
As you begin your quest, you need to stock up on power-ups early on to deal
with the menagerie of monsters faced later in the game. Turn round as you
walk out into the street and go back through the door behind you. This leads
to some crates that need to be smashed to stock up on health. Once you enter
the street proper, you encounter one zombie: use a couple of Up +
Square moves to slice this fool in twain.
When you have been left to your own devices, you can do a smash and grab on
the shop front to your left and collect the power-ups there. Then turn right
and destroy the crates in the doorway opposite and kill the zombie behind
them to equip yourself with more goodies.
When you have got your fill of items, head down the street towards the gate
to get your mission underway. As you approach the gate a werewolf will leap
out at you from the doorway to the right, so have your finger poised over
the guard button. The werewolves attack swiftly, so hammering the attack
button doesn't usually work - you can either leap out of the way and go into
a combo when they are off balance or keep blocking and striking with a few
opportune kicks. After this lupine deviant has been put in Rolf's animal
hospital you can head into the cellar he was guarding and kick in the zombie
down there to get to the switch that opens the gate.
Once you have flicked the switch, a wolf enters the cellar via a secret
passage, so you have to deal with him before you can search this chamber
thoroughly for the many items that are concealed within.
Another zombie and a werewolf block your path into the gardens when the
gates are open. Quickly slice the zombie in two before you engage the
werewolf in some serious hand-to-hand action. Shoot the barrel in front of
the garden entrance to blast the door off its hinges and enter this most
eerie of environments to do battle with the undead.
Destroy any zombies you encounter quickly so that you are able to deal with
the more troublesome werewolves without fear of being surrounded as you head
through the garden Check out the building in the middle for power-ups before
heading up the steps at the far end.
See those statues in the middle of the stairs? Yes, the ones that are
flying towards you shooting fireballs: you need to get them on the same
level as you to be able to strike them, as they usually float around out of
reach.
At the far left of the stairs by the river is a secret area containing
several health power-ups. To reach it, leap onto the ledge above the river
and follow it round until you get to a tunnel.
When you have searched the gardens enough, take the steps downward by the
second set of stone gargoyles to reach the lair of one of Adam Crowley's
'associates' and receive the first of many cryptic clues.
Level 2: Search For The Meeting Place
Turn around and smash the crate behind you to get a health power-up, then
smash your way through the wooden picket fence in front of you. You are
confronted by one of Crowley's four-armed creations: these are quite
slow so a combination of kicks and punches should send him back to the
netherworld with a minimum of hassle. Head up the steps to the right and
flick the switch there to raise the portcullis that leads into town.
As you walk through the gate, another four-armed bloke leaps out of the
shadows and attempts to tear you apart. Use the same method as before to
kick him into the gutter before smashing open the crates at the far end of
the section to get some health orbs.
Kill the zombie that is lurking in the archway to the right and walk over to
the wooden gates and batter them open. Smash the crates in front of you to
get some health, then turn left and head for the bush in the corner. You can
hack down the bush to reveal another secret area containing an extra life
and the repeater. When you have collected all the power-ups, return to the
main street and continue on your way.
As you head towards the next picket fence, a huge blue monster will storm
through it: make sure you block all his attacks, as one hit from this
can halve your energy bar. The blue monster is quite slow so as soon as it
gets close go straight into a combo or hit him with a few jabs and you can
kill him quite easily.
As you reach the end of the street you come to a dead end. As you are
pondering what to do next, two zombies smash their way in through the walls
to the left. When they rush forward to attack, leap back and cut them in two
with your power move. After they have been dispatched, make a search of
their bodies and you should find a health pack.
Go through the newly formed archways and follow the road until you reach a
stack of crates. Approach the crates cautiously as a four-armed creature is
about to appear and chuck them at you. Once the crates have been toppled,
you can rush in and kill the abomination before it has a chance to attack.
After you have stepped over his smouldering corpse you are faced with
walking under a couple of low bridges. This may not sound formidable but as
soon as you cross under a bridge you'll be showered with masonry (looks
like someone should get onto the council). You can run through it quite
safely, but once you are out the other side you'll be attacked by another
blue creature so be on your guard.
You get another choice of routes when you come to the end of the present
alleyway. Take the right turn and head towards the crates to get to another
secret section.
When you have battered the zombie guarding the crates, you can search this
area at your leisure. In the far corner of this section is another bush
which can be destroyed to get to a second secret area containing a
four-armed monster, a repeater, and some explosives. Kill the four-armed
creature to replenish your blue bar and collect the marvellous weapons of
destruction before you head back to the main road.
As soon as you get back onto the main road, the wall to your right caves in
and a huge blue monster storms out. He's soon joined by a zombie and a
four-armed dude so now would be a good time to use the repeater. When you
have terminated these adversaries, the way to the end of the level is nearly
in sight. Head for the pile of crates at the end of the street and smash the
red one to get a pistol then proceed up the stairs. Across from you is a
four-armed creature: take aim with the pistol and put a shot in the
crates in front of it to clear a path to the bridge. The monster then surges
forward to attack you, at which point you should wrap your weapon round his
head and cross the rickety bridge.
Flick the first switch you find and batter your way through the grate and
quickly run past the blue monster to head for the secret area opposite -- if
you don't go fast enough the entrance will collapse, leaving you to fight
the blue monster.
After you have collected all you can, return to the road and continue round
the pathway, defeating all the monsters that cross your path. You'll spot
Crowley's 'associate' in the distance: he will begin to run, but don't
bother chasing after him. The evil git will blow up the bridges as he
crosses them, leaving you stranded. As it is impossible to catch him at this
early stage, you may as well take your time when jumping the gaps to avoid
wasting a precious life. When you have crossed over all the bridges, you can
follow Crowley's associate into the meeting place to face the ultimate
adversary
Level 3: The Four-Headed Fire-Breather
As you approach the mysterious hole in the centre of the room, a four-headed
monster breaks through from the sewer below and you must bear arms to deal
with this horror from the underworld. Stay on the move at all costs:
the ability to breath fire in four directions is the creature's main
defence.
To kill this monstrosity you must destroy the wooden pillars surrounding it.
This can be accomplished by a singled well-aimed blow with your weapon.
Every time a pillar falls onto the pit, the monster will be stunned; so if
you manage to continuously drop pillars, the reptilian scum won't be able to
attack you before you have crushed him under several hundredweight worth of
B&Q joists.
Level 4: Sewer Chase
Turn to your left when you have dropped through the manhole and collect the
red health orb to replace the energy that the darned snake took off, then
begin your journey down the tunnel.
The first creature you encounter is a blend of half lizard, half insect. It
moves a lot faster than the previous creatures so be sure to use the guard
button liberally as you wait for an opening to attack.
When this disturbing adversary has been destroyed, go forward slowly until
the tunnel caves in. To get past the crates behind the rubble, you need to
push the cart with the barrel of gunpowder and stand well back to blast a
path through.
As you approach the next section of tunnel, a blue monster will punch its
way through the wall to get to you. He'll attack from the left so lay a few
mines down before you pass by his hiding place, then when he runs out he'll
die violently.
You begin to get the feeling that the tunnel is not entirely safe as the
collapsing begins to occur frequently. Don't worry about this for the moment
as there is another insect creature in the following antechamber for you to
contend with.
Further down the tunnel another blue creature lies in wait. Use the same
tactic as before to erase his sorry ass, then check out his hiding place to
pick up a pistol and a gold orb.
The end of the tunnel is guarded by another insect monster. Once he is
dogmeat you get a choice of directions. You can either head for the exit or
go the other way - this is a dead end so you are better of proceeding to the
exit.
A big blue monster will crash through the wall at the side when you start to
walk to the exit, so be ready with those mines. Grab the power-ups he leaves
when you drop him and head on down the tunnel.
You're again faced with a choice of routes: one of these is also
barricaded so you need to take the right turn to get to the exit. This route
takes you into a massive chamber with a huge mutant squid in the centre.
Kill the insect creature to the left and smash the crate there to get a
pistol. As the squid comes towards you, fire your pistol in its general
direction and you should set off the wagonload of explosives behind him. The
demise of the squid leaves a massive hole in the ground: to cross this
deadly drop you need to jump over at the far right side.
On the left of this section is a massive room of crates: be sure to
search the room thoroughly and pick up all the health there for later in the
level.
When you have had your fill and are ready to continue, head round the corner
to the pile of crates there. They cannot be destroyed but they make a handy
vantage point from which to chuck mines at the approaching blue monster.
When you have gingerly stepped over his remains, take the left passageway
and walk along until you get to a dead end. Collect the orb from on top of
the nearest crate and retrace your steps and continue along the opposite
passageway.
Things start to get tough here as two enhanced blue creatures plough through
the walls to the right. These blue creatures can take twice as much
punishment as normal ones but thankfully are just as slow so a few good kick
combos will see them off in no time.
Go through the opening left by the creatures' passage and smash down the
wall at the left side. Follow the passage round and take the first left
turn. If you take the other turn you'll circle back round and waste valuable
time; there are a few power-ups hidden round there but they aren't worth the
effort.
Eventually you come to another dead end. Kill the blue monster there and
collect the items by the crates before taking the previous left turn.
Two insect blokes are waiting to ambush you here so be ready to pull your
pistol. When you have cleared the room of nasties, walk over to the right
and take a look out of the window to get an excellent view of London. Take
the first exit you find and make your way down the tunnel, but be wary of
ambush as there are insect dudes lurking round each corner.
When you get to the open sewage channel, your leaping skills will be put to
good use as you attempt to cross the effluent whilst being attacked by a
squid monster from hell. If you have a pistol you can just shoot the
explosives that are conveniently placed around the squid monster to stop his
tentacle-lashing antics. Once you have got past him, make your way across
the wood to the antechamber containing the blue monster. Defeat the monster
and hit the switch to raise the gate in the chamber at the far end of the
sewage channel.
Now you have to cross the rafts and head over to where you destroyed the
squid creature. Keep following the rafts round until you get to another
squid thing. Kill it, then cross the logs over to the far shore. The way
ahead is easy now as all you have to do is follow the tunnel round, killing
the insect creatures as you go, until you hear a gunshot which will signify
the end of this arduous level.
Level 5: The Pub Crawl
Check out the crates behind you to equip yourself with some health, then go
into the courtyard and clear it of zombies. There are two ways to proceed to
the docks from here. The first involves making a leap across the ruined
bridge; the second is to walk right up the steps and take a running jump off
the ramp there into a secret area. In the latter you must kill the zombie
that is wandering aimlessly around and collect the torches from off the top
of the crates behind him. A blue monster will crash through the boxes to the
right and attack, but eliminating his slow-moving bulk shouldn't be a
problem. Once he is defeated, flick the switch on the right of the
portcullis to raise it and gain access to the docks.
Pull your pistol immediately and waste the squid creature that is lurking in
the blackened waters of the Thames, then check out the crates to the right
of you to get some more health.
Run forward into the loading yard and jump back quickly to avoid the blue
monster that jumps down from the top of the building. After you have killed
it, smash the crates in front of you and collect the dynamite before
proceeding up the steps.
Yet another squid monster is waiting in the water to lash out at you, so be
sure to put one straight between his eyes or run past very swiftly,
whichever you prefer.
As you start to ascend the steps in front of you, be ready on the sidestep
button as those neatly stacked barrels are about to come rolling down the
steps towards you courtesy of the blue monster hiding there. When you have
recovered your wits, give it a good kicking, then run round the corner and
smash in the door.
The roof of the warehouse you enter is rather unstable so be on the lookout
for falling planks. There is only one blue monster to kill here so you won't
have to stay for very long anyway. Be careful as you leave, though: the
pillars near the door are just waiting to collapse.
Turn right as you re-enter the docklands and smash the crates to get some
more health. When you walk along the ramp you'll immediately be set upon by
two flying harpies. These take only a few hits to kill and they cannot
block, but their fast attacks can be tricky to dodge. When you have defeated
them both, go down the ramp and kill the zombie wandering about, then cross
to the other side of the yard and smash the crate there to get more health.
Return to the dockside once again and walk round until you meet a blue
monster. Kill him and the harpy that backs him up and continue along. You
should come to a ship at anchor. Board it using the gangplank and prepare
yourself for a four-on-one duel. First to feel your wrath is a blue monster
that attacks as soon as you get on deck. He is swiftly joined by two zombies
and a second blue monster that crashes through the aft deck. The torches
that you picked up earlier come in handy here so put them to good use to
stay alive. When the ship has been cleared, run to the aft where the blue
monster broke through and climb down the stairs. On the left there should be
a stack of power-ups for you to collect. When you have these, go the stern
of the boat and walk along the plank at the end, being careful to dodge the
hook on a chain that is swinging there. Down below, you should be able to
see a bit of the dock. Turn so that you are facing the dock and make a jump
for it. If you land safely you'll be richly rewarded with an extra life and
a meaty weapon upgrade. Luverly!
After admiring your finds, use you new weapon to destroy the crates in front
of you so that you can get onto the dock proper. Return to where the ship is
moored and continue past it. Cross through the gate to the right and defeat
the blue monster there.
Run through the next gate and kill the blue monster guarding the switch,
then use it to raise the portcullis in front of you.
Enter the portcullis and you're faced with a gap that must be jumped. The
thing is, there are three deadly pendulums that must be dodged while doing
so. Don't be intimidated by the pendulums - simply wait until there is a gap
between them and take a jump through. If you have managed to stay alive, go
behind the mesh screen to your left and flick the switch there: the
door in front of you opens and a blue monster rushes out. Defeat it and the
other one in the next room, then make your way back out to the mean streets
of London.
Two more blue monsters have to be defeated, then all you have to get through
is the second pendulum trap and you'll finally reach the pub in time for a
swift half.
Level 6: Samuel's Tomb
Walking through a graveyard at the dead of night in a monster-infested city
is not the sanest thing in the world to do, but do it you must to find the
tomb of Samuel Pepys.
Snow is falling amongst the tombstones as you tackle the first of three
werewolves in the corridor of crypts that you pass through. The second
werewolf leaps from a crypt to your left, but he usually leaps the wrong way
and doesn't pose much of a threat. The third werewolf guards a tomb
entrance: take him out and head into the darkness to find a secret
area. Open the coffins carefully, as lurking inside are three members of the
undead and a werewolf. Kill them all so that you can search the coffins for
goodies. In one of them you'll find a new lightning weapon.
Return to the main graveyard once again and smash your way through the
gates, decapitating the zombie on the other side for good measure. Climb the
stairs and deal with the werewolf at the top before turning to your right
and breaking into the main graveyard.
Collect the repeater from the crates on the left, then walk across the
graveyard towards the sounds of howling. Kill the wolf and move carefully
across the snowy ground that looks a bit too empty. "This is too empty" will
probably be your last words as that a******e Crowley emerges from the
shadows and tries to finish you with a hand bomb. You have to move like
lightning to avoid his attack, otherwise you'll lose a life.
When Crowley has scarpered, stay on the path and cross the graveyard as
quickly as you can. A few zombies will rise from their graves to attack you,
but they shouldn't pose much of a threat. When you come to the end of the
graveyard, there are two gates you can go through, but first you must
destroy the harpy creature that tries to get you in the back as you leave.
Take the gate on the left first as this leads you to a crypt containing an
extra life and a torch weapon, but you must defeat the werewolf and zombie
guards before you can get your hands on the power-ups concealed in the
coffins.
The right gate leads to the second graveyard. More zombies will step from
their graves to prevent your progress: save the undertaker the job and
bury them. After these two clowns have gone the way of all flesh, a harpy
enters the fight. Dispatch her with a few quick swipes of your staff and
turn right to get to the third graveyard.
The third graveyard is surprisingly short. All you have to contend with is
one harpy before you enter the grounds of the chapel.
As you enter the grounds of the chapel, watch out for falling statues. There
is also a werewolf skulking round the corner and a zombie staggering about
in the centre to contend with. As you walk round the U-shaped courtyard,
werewolves crash out of the windows of the church Resident Evil style, so
stay on guard or they'll surround you and rip you to shreds. There are three
wolves in total that attack from the windows, so if you try to lure them out
one at a time you should be safe. Slice in half the second zombie that
appears by the exit as a parting gesture as you leave this hallowed ground
and make you merry way to the next part of the chapel.
Another werewolf/zombie duet must be faced before you can go over to the
barrel and collect the pistol from the crate. Dispose of the barrel with a
pistol shot, then make your way through the ruins of the gate to the
underworld below.
After passing through the roots of ancient tress, you're attacked by a
harpy, zombie, and werewolf in quick succession. When they are dead you can
check out the coffins at the sides of the room before making your way to the
surface.
This is the final graveyard so be prepared for anything, or maybe not as I
am about to tell you what is going to happen. The usual combo of
zombie/harpy/werewolf overtly try and stop you reaching the tomb and by now
you can probably take them out quite easily. As you approach the tomb, a
werewolf will leap from on top of it to maul you, so be ready on that guard
button as you get near. After you have given him a sound kicking, you are
free to finish the level.
Level 7: The Gardens
After cleverly following the trail of slime (not looking for trouble, these
two) you'll leave the cemetery. The streets of London are still littered
with four-armed monstrosities, so keep your combos on standby. When you have
killed the creature in the courtyard, you can head out into the streets once
again. Two more creatures smash their way towards you as you pass though the
gate into the gardens. They're soon backed up by a third creature that's
waiting at the exit to the garden.
When you have made your way through the garden and round the corner, you
come face to face with one of Crowley's new creations, an eight-armed spider
hybrid. The spider is easier to defeat than it looks: just wade in with
kicks and be ready with your weapon when it counterattacks.
As you make your merry way along admiring the scenery, look to your left and
you'll see a pleasant little pond containing a cute squid creature. Put a
bullet in the creature, if you can spare it, then walk to the right of the
pond and collect the thunderflash there.
Return to the main pathway and climb the steps to face another four-armed
dude. He'll roll barrels down the stairs towards you as you begin to climb,
so stay to the side to avoid injury. When you step forward to attack the
four-armed creature, a spider hybrid will rush towards you. Stand your
ground and fight - if you move forward another creature will burst through
the side and things will start to go pear-shaped.
Step over the gory remains and check out the spiders' lair to your right to
get a torch. Run forward along the path and you're attacked by a spider
hybrid. Knock ten bells out of him and go down the second pathway to your
right and smash the fence to your left so you can jump into the garden below
and get the health there. Quickly return to the street and run to the last
pathway and do the same to find a secret chamber containing more health and
explosives.
Head through the gates and tread carefully as you go through the woods:
two four-armed creatures are waiting in ambush. Dispose of these and head
towards the gate at the end. Another four-armed dude bars your exit. Slay
him so that you can continue across the bridge.
Back off and unload your pistol on the squid creature that destroys the
bridge so that you can leap over the gap safely, then ignore the turning to
your left and descend the steps into the square below.
The square contains a spider creature and a four-armed dude. Cap 'em both
and go through the gate to the left to pick up a mine, then return to the
square and descend the second set of steps.
You once again return to the docks for yet another confrontation with the
squid creatures. They can be avoided, but there are quite a few power-ups to
be gained by killing them. Turn right and head to the broken jetty: two
squid creatures will rise from the waters. Shoot the creatures with the
repeater or a couple of pistols and jump across the jetties to get an extra
life. Return to the dockside and shoot the next two squid creatures at the
second jetty. Cross this as before to collect the power-ups. From the end of
this jetty you should just about see another squid creature in the distance.
Execute him, then you can cross to the secret platform containing another
extra life.
Get yourself back to the dockside and walk to the end. A four-armed monster
will lunge from around the corner, so be ready to hack his legs away with
your weapon. Once you have turned the corner a spider hybrid will
attack: drop him using the same tactics as before, then collect the
thunderflash and run back down the dockside.
When you reach the end of the docks, turn right and walk up the steps to the
web-encrusted spiders' lair. The two spiders that drop from the roof above
are twice the size as the ordinary ones, but the same tactics work when
fighting them so they shouldn't be too hard to defeat.
All you have to do to finish the level is walk through the web-encrusted
iron gates and you'll find Crowley making his getaway in a rowing boat.
Naturally you must put aside you Christian morals and rob a boat to give
chase.
Level 8: The Docks
You arrive at the docks across the river just in time to be attacked by a
blue monster. Move away from the docks quickly as it has a nasty habit of
shoving you into the water. When it is downed you can start making you way
through the narrow causeways of the dockyards.
Watch out for the swinging chain as you walk over to tackle the insect
creature ahead of you. It's moving quite slowly so you can just run through
it. When you start to fight the insect creature, things get a bit tricky as
the darned critter tries to push you into the water. You can get your own
back by luring it into one of the many deadly swinging chains for a laugh.
Go left at the junction and head down the gangway. A blue monster is waiting
further along, in between two chains. Rush the monster and hit it with a few
combos before it can recover and push you into them - ideally thunderflash
could be used for this purpose.
As you step in the blue monster's guts to continue on your way, a squid
creature wrecks the boards ahead. You must kill it so that you can cross
over the boards: if you are out of ammo you can blind it with
thunderflash before wading in with your weapon.
When you have crossed over, turn to your right and smash the middle window
to get a razor power-up. Sprint through the swinging chains ahead and get
ready to do battle with the blue creature that smashes its way through the
crates. You should use a thunderflash here so that you can take the squid
monster behind him to the cleaners as well. Grab a replacement thunderflash
from the box next to the rapidly decomposing body of the squid before moving
along the boardwalk to your next encounter.
An insect creature will leap on top of you and rend you with its claws
unless you can dodge out of the way before it gets through the crates ahead.
Once it is defeated, smash the remaining crates and help yourself to two
pistols and a torch.
Go through the archway to your right and continue straight until you meet a
blue monster. Head towards the crates when you have defeated him and you can
pick up a weapon upgrade and some health before returning to the archway.
Turn right when you reach the archway and gun down the squid creature
lurking across the quay. Cross the gangplank to get back on the dock front
and deal with the blue creature that comes charging towards you, then shoot
the squid that rears out of the water to your left. The way ahead is blocked
with indestructible crates so you'll have to turn right and head down the
jetty to make your way to the gangplank on the far side. More squid
creatures pop from the water at every turn, so be ready with the
thunderflash and a few swift cuts.
When have balanced your way across the gangplank, an insect and a blue
monster will attack immediately, so sort 'em out with a torch or two so that
you can live to see the end of your quest. With them out of the way, walk
over to the boxes to the left and squeeze through the side. There should be
a boarded-up door in front of you which should be kicked in so that you can
get to the secret area. Take out the squid creature and grab the health from
on top of the crates to the right. Run along the gangplank and leap the gap,
dodging the chains that swing overhead in the process. When you reach solid
ground, pick up the extra life from the crate, along with the pistol and the
torch, then return to the entrance so that you can continue your mission.
The squid monster at the end of the walkway should pose no problem as
someone has conveniently left a couple of barrels of gunpowder for you to
roll towards it. Wipe the remains of squid from your costume and sprint
through the deadly swinging chains ahead.
In the square in front of you await a blue monster and an insect dude. Clear
them from your path and leave via the right passageway. You come to some
crates and your way is blocked by a broken walkway. Climb on top of the
boxes and smash the brown one to equip yourself with a torch, then leap
across the gap. Shove the blue monster on the other side into the water with
a few combos, then walk slowly over to the window ahead of you. An insect
creature will fly through it: stand your ground so that you can trap it
in the corner and kill it, then grab the health orb left in the window.
Walk straight ahead and run past the squid to your right, then take the
first turn left. Follow the walkway round, running past the squid monsters
and killing the three blue monsters concealed round each corner.
Upon reaching the boat, Crowley mysteriously vanishes, leaving nothing but a
corpse and a cryptic clue in his wake.
Level 9: The City Streets
Walk into the courtyard and take the spider hybrid's legs with a few leg
sweep combos, then turn right and walk up the steps. Break the window you
should now be facing, then head for the gate on the far side of the
courtyard and leave this place.
Run past the spider creature on guard here and go through the gateway to
your right. Kill the two spider hybrids there and walk down the pathway
ahead. Execute the hybrid wandering about there and run to the steps. The
barrels on the steps will be chucked at you as usual so don't forget to keep
to the side. Destroy the barrel-chucking spider and the other hybrid behind
him and carry on walking until you get to a dead end wall with barrels
stacked next to it. Destroy the barrels with some dynamite or a pistol shot
and stand well back.
Clamber over the smoking rubble and get ready to deal with a knife-wielding
cultist. Dealing with Crowley's minion is easy: simply pile on the
combos so that he can't fight back and he won't stand a chance, or just back
off and hack him in two.
Take the left turn when you have finished him off and walk over to the three
windows to the left. Two zombies and another cultist will leap out at you.
Kill them in short order and scour the area for power-ups.
Run back the way you came and through the broken wall until you reach the
yard where you killed the two spider hybrids. Take the web-shrouded tunnel
entrance on your left.
There are two hybrids guarding a switch here. Defeat them and flick the
switch to raise the gate near the exit. Turn left and destroy the hybrids
there. Take a look around the room and you'll find an extra life along with
several other power-ups.
Make your way out of the tunnel and return to the main square. There are
still a few hybrids hanging around so be sure to deal with them to keep your
time bar high. Make your way through the square and leave by the west exit.
As you journey through the deserted city streets, you'll happen upon a
werewolf feasting on a horse. Hit him with a long-range attack while he has
his back to you, but be ready to defend yourself against a second werewolf
that crashes through the window opposite.
When these lupines have been maimed beyond all recognition, search the
window which the second wolf crashed through and collect the skull from its
resting place, then begin walking down the street ahead of you.
A knife-wielding cultist will thrust his blade at you from the shadows:
sidestep quickly and go into a few sweep combos to get him off your back so
that you can proceed round the next bend.
Use a stick of dynamite or a pistol shot to destroy the barrels to open up
the wall in this dead end and engage the spider hybrids that are guarding
this area. With the hybrids out of the way you can safely smash the windows
to your right and grab the power-ups there. Go round the corner and hit the
switch. Now you have to do a massive run back to the central square with the
two pillars adjacent to where you started: there is no need to worry,
though, as there should still be a knife-man patrolling the area for you to
replenish your time bar with.
As you walk through the single archway at the north of the square, a hybrid
trundles towards you. It is reinforced by another hybrid that jumps through
the window to the right, but a couple of sweep combos should drop these
arachnids, allowing you to walk through the triple archway ahead.
Three creatures are on you straight away as you emerge from the
archway: a hybrid, zombie, and knife-man. Use a torch to stop this
these attackers in their tracks so that you can explore this web-less
domain. If you take the left road all you'll find is a hybrid for you to
kill; take the left path, however, and in addition to finding the way ahead
you'll also discover an extra life in the shadows to the left.
Smash through the fence on to the right and head into the spiders lair. The
roof is a bit unstable so make your way slowly and the spider here will be
crushed by falling rocks (ho, ho, ho).
When you exit the spiders lair turn to your right before proceeding to the
bank and leap over the fence to get a weapon upgrade, now you are ready to
face the monsters waiting for you round the next bend.
Two zombies and a knife-man will crash though the window to your left, when
they do run forwards and attract the attention of the hybrid on the other
side of the archway in front of you. When the creatures close in use a
repeater or a torch to finish them off en masse. Now you can pick up an
extra life from the far right window that the zombie crashed through before
you approach the end of the level.
All you have to do now is walk through the archway and smash open the gate
to enter the bank and complete the stage.
Level 10: The Trail Of Blood
Before you continue your pursuit, grab the orb on the pedestal to gird you
in your task, then head down the steps following the trail of blood. As you
enter the peaceful-looking snow-covered streets, one of Crowley's deadly new
gargoyle creations swoops in to attack. This freak can take a lot of
punishment before dying, it also has an annoying knack of dodging all your
attacks and running down your time gauge. Use single attacks to unbalance it
before going into one of your more powerful combos or just shoot it. Another
gargoyle is waiting further down the street. Get him to follow you to the
very end of the street where there are two cultists on patrol, then use a
torch or repeater to take out the whole bad bunch of 'em. As you stop to
survey the smoking remains, break open the windows at the right of the
street to equip yourself with a razor power-up.
There is only one way to go now so continue down the street and keep
following the trail of blood. There is nothing to find in the next cold,
quiet street and your only adversary is a werewolf that jumps from the
middle window on the right so continue quickly on your way to keep your blue
bar high.
When you reach the end of the road, turn to your left and destroy the barrel
next to the gate to open a secret area containing a repeater and a health
orb. Retrieve them as fast as you can as there are no creatures round here
to refill your time gauge with.
Continue your trek by running right to follow the trail once more. As you
approach the bend you'll see an iron gate to your right: break the
window next to it and grab the dynamite hidden within. As your blue bar is
now perilously low, crash through the iron gates next to you to confront the
werewolf there. Beware, if you move too far into the courtyard a cultist
will leap from a doorway to join the fray. Eliminate them both and break the
window to the left to get the ice weapon and a pistol. There is also a mine
at the other end of the yard on a pillar so you might want to have that as
well.
Return to the main street and proceed down it and you're met by another
knife-man and gargoyle. Naturally, you must test out the ice weapon on these
hapless minions to see what it does.
Walk round the bend in the street and break the windows on the left to find
a pistol before making your way down the narrow alley opposite where you can
hear the ungodly sounds of some mis-created creature. Destroy the gate at
the end of the street and prepare yourself for the next challenge.
You now find yourself inside a meatlocker with two werewolves to keep you
company. Dodge round the carcasses and hack away at them from a distance.
When you are done, collect the full energy orb from the crate at the far
end, then smash your way out the other side.
Walk over to the cart with the barrel of gunpowder on it and shove it into
the gate opposite. Step through the smoke and walk into the warehouse on the
left of the street. Two werewolves leap from the tops of the crates to
attack: when you are fighting these lupines, watch your back as there
is a knife-man sneaking up on you. Search the boxes the wolves pounced from
to find a full health orb and another handy ice weapon to add to your
arsenal. Take all of these and return to the street outside.
Ignore the left turn, as it only leads to a dead end, and proceed forward to
encounter the first of three enemies. If you carry on running when you meet
the gargoyle, you'll encounter a werewolf and a knife man. By doing this you
can once again take out the whole group by using a powerful weapon such as
the ice or torch.
Flee this scene of carnage and round the horseshoe bend at the end of the
street, expecting trouble. The trouble arrives in the form of a gargoyle
that crashes through the window above, showering you with glass. Luckily the
alley is quite narrow here so you can just trap the fool in the corner and
smash its face in.
A knife-man is blocking the street ahead, asking to be cut in two. Oblige
him, then head under the bridge and dodge the second knife-man that lunges
from the window, looking for some action. Drop him and do a smash and grab
on the windows surrounding you to reveal a pistol and a full health orb.
Follow the street round and you'll be attacked by another werewolf. Get it
to chase you until you reach a frozen pond. Two gargoyles will leap from the
pond and stop you from running any further. Wait for the werewolf to catch
up and use the 'heavy weapon group kill' tactics to finish them off.
There are only three more enemies to kill to finish the level. To reach them
you need to climb the steps. Gather them in a group when you get there and
finish them off as before. If you are out of special weapons you can just
run over to the blood by the gates and batter your way through them to
finish the level.
Level 11 - The Snow Beast
Fortunately the snow beast is not as tough as the hydra boss, but it still
takes a lot of killing. To defeat the beast you have to hurl dynamite to
blow up the six barrels located next to it. The snow beast, however, is
determined to bring an end to your monster-slaying antics with its deadly
accurate snowball throwing. If struck by a snowball you'll be knocked to the
floor and lose a wedge of energy, and as you try to stand the Snow beast
will mercilessly knock you back to the floor before you can react.
You need to time your attacks on the snow beast with care to avoid an icy
demise. The first six balls it throws home in you so keep sidestepping and
you should avoid them with little trouble. After this initial attack, the
beast will roll two snowballs down the centre of the isle. Use this
opportunity to sidestep to the edge of the hall and unleash a stick of TNT
at the barrels, then resume sidestepping to avoid the next six homing balls
it throws at you before you can attack again.
If you run out of TNT or are desperately low on health, you can collect some
from the podiums at the side of the hall. The items reappear after a while
so you won't run out, but be sure not to try to pick anything up while the
beast is throwing those homing snowballs at you, because it will hurt.
Level 12: Regent Canal
More narrow gangplanks and deadly waterways await you as you continue your
pursuit of Crowley. You start the level facing some crates. Turn round and
walk to the gangplank, plug the squid there, and grab the health orb that
lies on the podium to your right.
Cautiously step forward and leap the barrels that come rolling down the
steps at you, followed by a blue monster. Defeat the monster, walk up the
steps, and take the turn left at the top. Walk down the dock and you will be
approached by a rat creature. This freak isn't even as tough as a werewolf
so don't spare it a thought as you cut it down. Proceed to the window at the
far end and get ready to block as a blue monster smashes through the wall
next to you. With the blue monster out of the way, you can explore the cave
from which it emerged. Turn left as you walk inside and follow the passage
round to find a job lot of goodies. Behind them is a grate that prevents
access to the extra life: you need to hit a lever later in the level
before you can return here and help yourself to it.
Your time bar should now be dangerously low so run back to the place where
you killed the first blue monster. Keep heading up the street and you'll be
waylaid by two rat men that crash through the wall to your left. Kill them
both to replenish your time bar, then head through the gap which they
emerged from.
Defeat the blue monster at the end of the corner, then continue left round
the steps. There's another blue monster lurking in an alcove on the
right: tear his blue hide to shreds and pick up the health orb behind
him.
As you approach the next large room a solitary rat creature attempts to
strike you down. Repay his bravery with a few swift blows to the head and
take the left-hand bend to flick the first lever.
Now you have to do a mega run back to where you started the level. Once
there, go to the bottom of the steps and face the canal. You should be able
to see a concrete outcrop. Leap across to it and follow the passage round to
acquire the extra life you saw earlier.
Return to the edge of the canal and walk along until you reach the first
jetty. Lurking at the end of it is a squid monster: cap it, then leap
across the gap to get to the other side of the canal.
Kill the blue monster and the two rat men that are concealed by the crates,
then smash the crates open to kit yourself out with some TNT. Walk right
down the docks and kill the squid monster that attacks you from the canal.
You'll soon reach a dead end with some unmarked barrels next to it:
shoot them to open up a secret area guarded by a rat man. After you have
severed its head from its body, a whole room of goodies awaits to be
plundered. When you've had your fill, take a walk up the docks to search for
Crowley once more.
You are approached by a rat man as you enter the second half of the dock.
It'll try to lure you into an ambush as there's a blue monster hiding behind
the wall to the right. Lay some mines down before you advance and you should
be able to take care of these two goons with ease.
Further down the docks you'll find some lines of very poorly washed clothes.
Two rat men drop from the bridge just up ahead to attack. Dispense with
these annoyances and smash the two marked crates behind them to gain a
health orb.
When you reach the narrow walkway, chuck a mine onto it and entice the blue
monster behind the iron gate towards you: it'll come a cropper on the
mine, leaving the way clear for you to dash forward and hit the lever. The
lever drains the water away, allowing you to cross the empty canal to reach
the exit. First you'll have to deal with the blue monster ahead. The poor
fool is surrounded by barrels so a well-placed gunshot will cook him up
nicely: don't attempt to take him hand-to-hand as you'll more than
likely set off the barrels and lose a life. There are many items hidden
within the crates surrounding the blue monster's decaying corpse:
collect them quickly and give the rat man scuttling about in the background
a sound beating.
Go down the small passageway next to the white steps and head into the empty
canal bed. Pass through the drainage tunnel and run over to the steps at the
far end. Don't worry if your time bar is running low as a big blue dobba is
about to leap from the top of the wall to crush your skull. Remove his
intestines with your weapon and walk up the stairs. Turn right at the top of
the stairs, then tackle the blue monster and the rat man that tries a bum's
rush on you. When you are done stamping these trogs down, collect the full
health orb from the crate on the right and continue on your merry way.
Walk round the narrow pathway overlooking the empty lock and kill the two
rat men there, then go round the corner. All you have to do now is shred the
blue monster and the two rat men that enter the fray and you can calmly
leave this carnage behind to begin the next stage of your quest.
Level 13: London Zoo
Whatever you do, don't feed the animals here or they'll have your arm off.
Head over to the left wall across from where you start to find a full health
orb, then walk through the gates. As you start towards the tunnel, the gate
barring you path rises and a four-armed creature attacks from behind. When
you have rendered this minion unconscious, continue through the tunnel to
the cages above.
Upon arriving, you are set upon by a harpy and a four-armed zombie that
crashes through the wall to the right. Kill the harpy first to give yourself
some space, then take on the four-armed creature. Let him go if he retreats
as he?ll lure you into another ambush with a harpy. When he's defeated,
walk through the hole he left in the wall and into the cage to collect a
mine.
Return to the main cage area, walk round the corner, and kill the harpy
waiting there. On the right side of the path is a rusty cage: break it
open to find a pistol and some TNT concealed within. Exit the cage and get
ready for the four-armed zombie ahead of you to break out of its confinement
and do you harm. Deal him some damage then turn around and flick the switch
in the wall behind you.
Head deeper into the zoo until you come to a bridge -- a harpy will fly
across it to give you grief. Terminate this dozy bint quickly to prevent
yourself from being knocked into the water, then slowly cross the bridge to
face your next peril.
As you begin to cross the open ground towards the passageway ahead,
lightning will violently strike the ground nearby, causing some buildings to
collapse. Stand your ground and wait for things to calm down before you
continue.
Once the dust has settled, turn left and go through the gate. You're
immediately attacked by a spider creature. Whilst fighting it, keep your
back to the wall (ooer!) to prevent the creature pushing you into the water
ahead. Crush its skull with your weapon and cross over to the stone to take
on the four-armed zombie on the other side of the river.
Walk over to the web-coated archway on the left and kill the harpy and the
spider that appear ahead of you. If you are quick you can push the spider
creature into the water before it realises what?s happening, allowing
you to defeat the harpy easily.
Head into the webbed passage and mutilate the spider creature guarding the
chamber. Cross the chamber and turn right: two more spider creatures
rip there way through the surrounding cages to get to you. Using a razor
power-up at this point proves more hilarious than deadly when limbs go
flying as you go into a spider-slaying frenzy. Wipe the drool from your
mouth when the spider creatures are no more and flick the switch at the end
of the chamber. There are also two health pick-ups in the cages where the
spiders were hidden which you should collect before leaving.
On returning to the open, check out the cage on the other side of the stream
by making a running jump over to it. After removing the door from its hinges
you are rewarded with an extra life and other goodies that are crammed into
the back of it.
Cross back to the other side and continue up the pathway. A spider creature
will drop down behind you so be wary. There are two health orbs behind the
railings on the left. Getting to them is a bit risky so you are better off
leaving them alone. A four-armed creature awaits your advance as you begin
your trek over the bridge. Give it a good kicking, then wait for the gate
leading to the tunnel to mysteriously open, showing you the way to the
conservatory.
On entering the conservatory you should get that 'being watched' feeling.
Before you get a chance to look around, however, the glass dome above you
caves in, showering you with glass. As you are pulling the splinters from
your eyes, a harpy and four-armed zombie take you by surprise. Vanquish
these dishonourable foes so that you may proceed.
When you begin walking down the next path, keep clear of the barrels ahead,
as they are about to explode. If that wasn't enough, another of Crowley's
zombies is haunting the route ahead. As you meet this zombie in combat, a
harpy will fly in from the left to give you a mauling. Cleave yourself a
path through them and walk on into the blackness.
Two more spider creatures lie caged ahead, waiting for you to free them from
the burden of their lives. Naturally you must oblige these hapless arachnids
and mash them into pulp.
Finally you arrive battle-weary and exhausted at the display area, only to
watch Crowley unleash a handful of four-armed zombies upon you before doing
a runner. There's no time to lament, though, as you must soon wet your blade
with zombie entrails as they charge towards you. Once the area is cleansed
of undead, break the glass on the display cases to get a couple of items,
then climb the stairs and go through the door to finish the level.
Level 14: Marylebone
Pausing only to remark what a slippery a******* Crowley is, you enter the
monster-filled streets of Marylebone. Turn around as soon as you appear and
you'll see three crates on the other side of a drainage ditch. Do a running
leap across the ditch and destroy the crates to reveal a handful of items,
then cross back over to begin your journey proper.
A blue monster goes for you straight away. Use the level combo to erase his
ass, then charge forward and slice the patrolling knifeman in two before he
realises what's happening.
Whilst the blood is still drying on your weapon, head back to where you
started and do a smash-and-grab on the shop front there to equip yourself
with a health orb and a pistol.
Walk back up the street until you reach a dead end with a barrel in front of
it. If you don't know what to do here, seek professional help. Step over the
rubble of the now ruined wall into the tunnel ahead. Be alert for the sound
of rumbling as the tunnel is prone to collapse. You'll soon come across a
blue monster surrounded by barrels. With a wry grin on your face, turn this
doughnut into a blue greasy mess so that you may continue. As you round the
next bend, a knifeman will leap out on you and attempt to relieve you of
your life. Hit him with a powerful attack to end his murderous antics, then
walk through the tunnel towards the light.
As you emerge from the underground haven and enter the street proper, you
are waylaid by yet another blue monster on the prowl. Stave in his face with
your boot and return to the city streets. Knifemen swarm on you as you
stride bravely forward. Beat them down and more crash through the shop
window to your left. When you've made crow food of these cloaked knifemen,
search their hiding place to find a health orb. Still more monsters stumble
through the fog towards you as you approach the gate at the end of the
street. If you walk towards the gate, a blue monster will break the doors
down to enter the melee: it is a good idea to use the repeater or a
torch at this point to save your skin.
Get ready to dodge as you enter the next street: a carriage packed with
explosives hurtles right at you with a blue monster right behind it. Finish
the blue deviant quickly so that the knifeman hiding round the corner
doesn't get a chance to stab you in the back.
Tread warily along the cobbled streets of London until you reach a well.
Patrolling this area is a blue monster and a dreaded gargoyle. Pin the blue
monster against the well and hit it with a few combos so that you can take
on the gargoyle with a full time bar as it likes nothing more than to dodge
your attacks until your time runs out.
Head round the corner and you'll be bushwhacked by a knifeman. As he squares
up to you, a gargoyle will be preparing to strike from the shadows so back
off. These two creatures of evil now follow you in single file so you can
pick them off easily.
The bridge leading to central Marylebone looks peaceful enough. That is
until you try to cross it. Disturbed by your presence, a blue monster
decides the toll for crossing is death. Drop a mine in his path and he'll
pay with his own.
Lurking in a side alley out of sight is another gargoyle and a knifeman. Lay
some dynamite down before they can leap onto you and you should be able to
take care of them quite easily. Now go over to the two pubs on the right.
Smash in the front of the Braveheart (vandal!) to get a razor power-up and
break the window of the Lord Parkway to get a pistol. Whilst you are engaged
in these nefarious activities, two gargoyles will be bounding over to you.
Use a repeater or a couple of pistol shots to put these two down, as they
can be quite nasty.
A blue monster guards the courtyard ahead, put him in his place with a few
well-aimed blows and select a torch or repeater from your inventory, but
don't use it yet. Walk round the left side of the archway and make a search
of the shop fronts there to acquire an extra life and pistol. Turn round
quickly when you possess these items, as three knifemen will be closing in
on you from all sides. Use your selected repeater of torch to send these
vermin the way of all flesh, before dusting the charred flesh from your
attire and leaving the square via the west exit.
All is calm on the next street so you can admire your surroundings as you
walk through the iron gate to get to the main square. You suddenly realise
something's up when the gates seal you within the square. As you look about
for some means of escape, your attention is suddenly drawn by the fact that
the statues in the centre of the fountain are flying towards you. To deal
with these three massive gargoyles you should engage the razor power-up you
picked up earlier in the level. With your weapon edged like a razor, the
gargoyles become unwilling limb donors as they scatter before your might.
With the gargoyles dead, the gates open to allow you passage out of this
slaughterhouse. As you walk to the end of the last street, you find an
upturned cab in the middle of the road to give you a clue to your next
mission.
Level 15: Bloomsbury
Crowley's lab is located somewhere within these darkened streets. You must
find it to stand any chance of halting this terror. Turn round and collect
the full health orb hidden behind you, then quickly face front to prevent
the gargoyle behind you getting a few sneaky hits. Destroy the gargoyle and
its companion before walking through the fog-shrouded streets to begin your
search.
A gargoyle charges at you from the front when you enter the next street.
Avoid the urge to sidestep to avoid its attacks as there is another gargoyle
waiting to grab you from behind a wall. Instead lure them into the pillars
behind you so that you may trap the fools against the concrete and eliminate
them.
Advance towards the tavern in front of you and smash the glass. Amongst the
remnants of the window you'll find a full health orb and a pistol. Walk
forward and keep your eye on the shop front to the right: a gargoyle
will come flying through it after your blood. When you have pulled its heart
out, search the now smashed shop front to find a repeater, then walk round
the corner.
You'll suddenly be struck by the absence of enemies as you walk down the
alleyway. This is to prepare you for the brown trousers bit coming up. A
huge fire-breathing hellhound engulfs one of the side streets in flame and
roars a challenge to you. Wade in fast to give it a beating before it can
get close enough to use its fangs. Whilst you are giving this beast from the
underworld corrective brain surgery, a gargoyle will burst out of the window
behind you to complicate matters. Leap back when this happens and the hound
will begin to breath fire. If you dodge at just the right time, the gargoyle
will be hit by the flame jet instead of you! To defeat the hellhound, keep
sidestepping round it and lashing out with a few kicks.
When it bites the big one, walk over to the window near the flames and take
the dynamite resting there. Walk down the alley to the wall opposite the
fire and collect a full health orb. Walk back over to the fire and leg it
through. Keep a health orb selected so that you can use it if you get to
badly burnt. Once out the other side, take the weapon upgrade and the items
you find there and add them to your armoury. Return to the main alley and
walk down the steps. A spider creature runs through the doors ahead. Mess
him up with your new weapon, then turn round and flick the switch on the
wall behind you.
Walk into the hallway and manoeuvre round the spider webs. Look out for more
falling blocks as you pass beneath the archways and kill the spider creature
hiding round the corner. When you get to the steps, a fire demon swoops in.
Sidestep its small fireballs and deliver a powerful attack to cut it in two.
Climb up the stairs, a gargoyle will be perched upon the wall ahead, get it
to follow you down the alley to your right. You will encounter a hellhound
further down the alley let him take care of the gargoyle before you break
his bones. Don't try to search the flaming alley ahead as it only contains a
fiery death for your unwitting adventurer, instead take the right turn to
continue your quest.
There is no time to play tag with the next gargoyle you meet - remove his
skull to add to your collection, then kick in the shop front to your right
to obtain a pistol and a small health orb. Further up the road you'll see a
fire moving perilously close to a couple of gunpowder barrels. Walk up close
to them, then jump back quickly as the hellhound and the gargoyle move in to
attack. Before they get a chance to do anything, shoot the barrel and you
should be able to scatter these two to the four winds. There are no items to
be found in the fire, so don't take a chance on accidentally immolating
yourself. Just take the clear path ahead to continue with your task.
Two spider creatures stand at the top of the stairs in front of a tunnel.
Charge towards them and force the multiple-armed freaks down the stairs.
This way you can trap them in the corner and hack them to pieces in seconds.
Go down the tunnel, taking care to stop occasionally when there is a
cave-in, and run to the exit when you see the fire in the distance.
A hellhound leaps from the fire to belch flames in your direction. Get in
close and butcher it: the hellhound will use its paws at close range,
but it is so slow that you can just keep kicking it to pin it down. Step
round its body and tackle the spider creature scuttling towards you from the
alleyway on your right. Exterminate the spider and take the left bend ahead.
A hellhound will be prowling around the fire ahead of you. Draw him away
from the fire or the momentum of your attacks will carry you into it. Pummel
the hound into submission, then scramble through the hole in the wall to the
garden below.
You have no time to admire the fountain as you are greeted by a gargoyle and
a hellhound. Pin them both against the side of the fountain and unleash a
few deft combos on their demonic hides. When these two minions of evil have
been overcome, jump into the fountain and the statue in the centre will come
alive to give you grief. Give it a few haymakers to make it cough blood,
then step over its mangled corpse and inspect the fountain. On the side of
the fountain you'll find two health orbs and a pistol. Take these
much-needed items and head south across the fountain. You'll find a small
garden: dodge the hellhound's hot reception and trap it in the shed to
kill it. A search of its lair will turn up a razor power-up to add to your
collection. Leave the garden and walk east to the small iron gate there.
Kill the gargoyle hiding in this area and collect the razor that it drops,
then walk through the gate on the left.
Select the razor from your inventory and prepare to use it as you advance on
the fire at the end of the yard. A pair of hellhounds appear in the flames,
accompanied by two fire demons. Engage the razor power-up and sweep these
monsters aside, then step through the flames, dodging the exploding barrels
until you come face to face with Crowley. Alas, once again Crowley does a
'Jessie Owens' and flees his lab with a vial of some description.
Level 16: Pimlico
On entering the shattered streets of Pimlico, go through the hole in the
wall on the right. A blue monster is smashing up buildings in this area so
kill it quickly. Walk over to the hut in the corner, behind it is a crate
containing a full health power-up and a pistol. Get them both and go back to
where you started. At the end of the yard is another crate with a full
health orb and a razor power-up on it. Get these as well and go back through
the wall.
Look out for the collapsing ceiling as you go through the wall further up
the corridor. This leads to a tunnel that ends in an underground room
containing a hellhound. The room containing the hound is quiet large, so you
can easily manoeuvre round its burning attacks and kill it at close range.
Collect the item that the wretched creature has dropped and break through
the door in front of you.
A scene from Dante's Inferno greets you as you step out on to the burning
street. Leap onto the ledge to the right and walk forward. A hellhound and
blue monster attack from a side street. If you stay on the ledge, they can't
hit you and you can shower them with mines and explosives at your leisure.
Climb down when they have both been defeated and skirt the fires to get to
the next street.
There are holes for you to get through on both sides of the street. Go
though the one on the left first and defeat the blue monster there to
restore your time bar. Climb up the steps ahead and walk round the balcony
until you come to another set of steps leading down. Flick the switch next
to the steps to raise the grille in front of you, then proceed into the
corridor below. Look carefully at the right wall as there is a disguised
passage there which you should explore to stock up on items for the battle
in the main chamber.
Before you enter the main chamber you should shoot the barrels littering the
area so that you do not blunder into the during the ensuing combat: two
hellhounds and two flying demons are on you as soon as you enter, so make
for the steps on the right. Once you are on the platform you can lay down a
barrage of explosives to kill the minion below, but be wary of the flying
demons getting too close. From the safety of the platform you can collect
the two health orbs and the repeater, then return to the main street.
This time take the right exit through the broken wall and shoot the barrels
near the far wall to create carnage amongst your enemies. This should take
out the blue monster standing near the crates to the left. If it is still
alive, charge forward and shove it into the flames to finish the job. Now
all you have to contend with is the hellhound and the fire demon creeping up
behind you. Draw them away from the fire and into the narrow confines of the
alley behind you. They should now get in each other's way, enabling you to
wade in and rip their lungs out. Having surveyed the carnage with a
satisfactory smile, walk over to the crates on the right and get the health
orb from on top of them. Now climb the crates and walk along them so that
you can safely jump over the fire and through the hole in the wall.
Walk round the corner to the left and pick up the repeater there, then walk
slowly into the smoky street. Barrels of dynamite will come rolling down the
stairs - leap away from the explosive projectiles and kill the blue monster
running down behind them. Now you have a choice of routes: you can
either take the stairs which have deadly jumps and few monsters, or you can
stay on the ground where the monsters are wall to wall. If, like me, you
wish to see all the monsters dead, climb up the steps and eviscerate the
hellhound near the fire, then leap across the gap to reach the building on
the right (don't jump through the flames). When you land, take up arms
against the hellhound on the balcony and mess him up. Walk round the corner
and deal with the blue monster there. Now you can either continue across the
gap to the second courtyard, or you can go back the way you came and kill
the monsters there.
Assuming that you are a deranged psychopath, you should by now have returned
to the street below, where there is a hellhound begging to be killed, so
deal with it accordingly. Zigzag through the fire and attack the hellhound
and fire demon on the other side of the flames, then enter the courtyard
ahead. Destroy the spider creature here, then run into the main arena. You
will be attacked by a mob of five creatures. Use the repeater you discovered
earlier or you'll soon be overwhelmed. Once you have littered the ground
with corpses, walk over to the wooden fence in the top-left corner of the
yard and break it down. Two spider creatures have made their nest here:
be sure to clean it out with your blade. Destroy the fence in the right
corner this time and you'll be faced with another spider. Dust him, break
down the fence in front of you, and get ready for the big fight.
Run past the hellhound and over to the huts. A blue monster bursts out of
them - now would be a good time to use a repeater or razor power-up. If you
have no weapons to deal with them, don't worry as they will get in each
other's way, allowing you to take them out piecemeal. If you get hard
pressed, return to where you entered and stand in the doorway, as this
prevents them from attacking all at once. When you have downed them all,
walk over to the steps near where the blue monster emerged. Scale the steps
and slay the hellhound there. You should now have 100% kills, so walk
down the steps and go right towards the exit. The wooden pillar that you
have to pass by is decidedly unstable so keep stopping and starting to get
past alive. Once through, all you have to do is quickly sidestep around the
flames and enter the yard to finish the stage.
Level 17: Jose Manuel
As you enter the hall, Crowley's minion laughs and pulls his blades.
Readying your weapon, you prepare yourself to meet this maniac knife thrower
in mortal combat! Or rather not, as he has cunningly secreted himself within
an iron maiden and is lobbing knives at you from a fair distance. Grab the
full health orb from the ground in front of you, then flick the switch.
A zombie will come out of the pit in front of you: hit it with single
strikes until it falls over so that your momentum does not carry you into
the fire. Now you can run for the switch on the other side of the screen --
wait until Jose throws a knife, as he takes a second or two to pull another
one, enabling you to get across unscathed. Flick the switch there and the
spikes on the iron maiden will begin to inch towards him. Return to the
other side of the screen to repeat the process: you have to flick each
switch four times before you can finally skewer the top-hatted imbecile and
laugh about it.
Level 18: Westminster
Crowley has been busy burning down the Houses of Parliament -- must have
been the Government?s new back-to-work scheme that provoked his
breakdown. You have no time to ponder this when you enter Parliament,
however, as a handful of Crowley's minions are prowling the corridor. Run
left and grab the full health orb before the creatures are upon you. The
first wave of adversaries consists of two knifemen and three fire demons and
can be killed quickly. Kick open the door to the next corridor and take the
first left turn into the gardens.
There are two fire demons and two hellhounds in the gardens. The wide open
space makes it easy to close down and kill them. Opposite the entrance to
this area lies a burning doorway. If you are feeling lucky or brave, leap
over the fire into the corridor behind to take a short cut; if not, return
to the previous corridor and keep walking.
A hellhound bursts out of the flames ahead. Circle round it using the
sidestep buttons so that it doesn't drag you into the flames when you attack
it. Once it is defeated, turn left into the large corridor and kill the
hellhound and fire demon there. As you approach the door at the end, another
of couple of creatures flood out. Give them a beating, but don't even try to
go through the fire in the room behind as it is impassable. Run down the
passage to your left, being careful not to get caught by the exploding
barrels, and destroy the two creatures there so that you may proceed. This
can be quite tricky due to the number of fires scattered about, so you are
better off executing them both with a few pistol shots.
Be on your guard as you round the next bend as there is a knifeman waiting
in the shadows. Break his legs, then enter the hall and hospitalise the
minion there. Climb the staircase to the gallery and kill the knifeman
there, then walk round the gallery until you get to a couple of hellhounds.
To kill them instantly use the pistol at point blank range as this
decapitates them with one shot. Once past these over-grown mutts walk over
to the gap in the gallery ahead, make two jumps to get you over to the other
side and kill the hellhound there to get an extra life. The passage ahead is
blocked by fire so turn right and continue down the gallery until you get to
at room. There are two knifemen inside the room ahead so lob a torch in
there to burn them out. Once the room is clear you will discover it to be an
armoury, break all six weapon cases to equip yourself with the pistols
within. Walk over to the armour on the left wall and wreck it, then go
forward into the next room.
Only one knifeman awaits your judgment in here, so make short work of him
before helping yourself to the items in the background. Walk over to the
bookcase on the right. If you have destroyed both sets of armour, you should
be able to open it. Once it is open, walk into the darkened passage and pick
up the extra life there. At the very end of the passage is a grate: hit
it with your weapon to open it, then drop down. This short cut takes you
back to the main hall so that you don't have to walk all the way round the
gallery. Bypass the stairs this time round and go into the courtyard. Two
hellhounds have been left here by Crowley to guard his retreat. Make them
pay for their loyalty with their lives. Kill the two fire demons here as
well, then proceed through the gate in the right wall. In front of the door
is a pool of blood left by Crowley -- could your arch enemy be inside?
Level 19: Westminster Part 2
The end of your quest draws near, but don't relax just yet. Draw your weapon
in time to cleave the gargoyle before you in two. Explosions rip through the
corridor ahead as you advance, so move slowly to avoid injury. Drop a few
mines in front of you to kill the hellhound that is causing the explosions,
then deal with its winged companions. Smash the armour on the left and get
the health orb that comes out of it, then move slowly up the corridor, being
wary of explosions. A gargoyle comes racing down the steps to tear you limb
from limb: blow its head off with your pistol, then cautiously move
around the flames to get to the next corridor.
The top of the steps is guarded by a hellhound and fire demon. Wait for them
to attack you, as the stairway is about to explode in the middle: a few
mines wouldn't go amiss here. Walk up to the flames at the end of the
corridor. The left corridor is a dead end containing two monsters; the right
corridor contains a wall of flames that must be traversed to get to the next
section.
Gun down the first gargoyle you meet and dodge the explosions as you run
round the right bend. Another gargoyle awaits you at this bend so use your
pistol to remove it from your sight. Dealing with the massive fire that has
sprung up in the middle of the corridor is another matter. Take a run and
jump over the fire and into the next part of the passage. Leap the next
fire, but be on your guard when you land as there is a hellhound waiting for
you. Deal with the hound and clear the gallery of nasties. If you run out of
pistols, you can find one on the right side of the gallery. The gap in the
right side of the gallery leads down into a secret area containing a fire
demon. Once the demon has been removed, you can walk into the secret passage
he was guarding. There is a gargoyle concealed within the passage. Kill it,
then grab the mountain of items that are neatly lined up at the back. Strike
the door behind the items with your weapon and leap through the doorway and
over the fire. Now you have to run through all the fiery corridors and back
up to the gallery before your blue bar runs down. Worth it? I think
not.
Once you arrive back at the gallery, head through the door on the far side.
Enter the next room and run to the end, dodging the attacks made by the
hellhound until you get to the gargoyle. When you have got all the monsters
in this section grouped around you, use the repeater to sort them out, or a
couple of sticks of dynamite if you have them to spare. When the room is
clear, grab the small health orb from the box near the exit - you'll
certainly need it for later in the game. Then cross through the flaming
section of corridor and do battle with the hellhound there. Follow the
passageway round and enter the final chamber.
There's a hound and a gargoyle to kill here. Do so, then walk right to the
balcony outside. As you step out onto the balcony, a harpy and a gargoyle
will be on top of you in seconds. Beat them off and look around. You'll see
Crowley transform himself into a massive winged demon and attach himself to
Big Ben. Run along the balcony and into the other half of the room. Collect
your thoughts and ready your joypad: Crowley is about to get some!
Level 20: Adam Crowley
From his perch atop Big Ben, Crowley dispatches some demons to take care of
you. Don't engage them just yet - instead turn around and cross the gap
behind you, as there is a full health orb that you'll need secreted there.
Return to the main rooftop. Now it's time to kick some underworld ass (and
not because of the appalling album they released the year before last). The
winged demons are laughably inept at killing you. They are slow-moving and
the trails of fire they leave behind are easily avoided. To kill them
quickly, wade in behind them with a few kick combos and keep kicking until
they don't get up.
When all four demons have been dispatched, Crowley detaches himself from the
clock tower, seeking vengeance. This is one tough battle. You can only do
damage to Crowley with combos, so none of that cheap kicking stuff that got
you through the first few levels. The combos have to be at least four moves
long so that the last strike will be unblockable. Keep Crowley out in the
open, as he has a habit of attacking you in a frenzy when cornered, and
don't let him manoeuvre you into the fire or off the edge. When you have hit
Crowley with ten good combos he will stumble to the ground dazed. You must
now do another combo, but the last strike must be to the face. If you manage
to pull the combo off successfully, Crowley's head comes clean off. Once
again it will be safe to walk the streets of London (!?).
BRGDS,OGS.
|


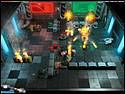

 )
)